Blog

  • How to Set Up a Smart Home with Alexa

    How to Set Up a Smart Home with Alexa

    Smart Home Setup with Alexa: Easy Guide

    Setting up a smart home with Alexa can change your living space into a convenient and efficient place. With Alexa, Amazon’s voice assistant, you can control your lights, thermostats, and home security system. You just need to use simple voice commands. This guide will help you set up your smart home with Alexa. It will make the process easy, even if you are not very tech-savvy.

    Understanding Smart Home Technology

    Before you start setting up, it’s good to know what smart home technology is. It means connecting devices and appliances through the internet. This lets them communicate with each other and be controlled from afar.

    The Basics of Smart Homes

    Smart homes use connected devices that can talk to each other over a network. This network lets you control your devices automatically or manually, usually with a smartphone or voice command. A central hub, like a smart speaker, usually coordinates the activities of different devices. This ensures they work together smoothly.

    The Internet of Things (IoT)

    The Internet of Things, or IoT, is an important idea in smart home technology. It means a network of physical objects that have sensors, software, and other technologies. These objects connect and share data with other devices and systems over the internet. In a smart home, IoT allows your devices to communicate with each other. This makes automation and integration easier, improving functionality and convenience.

    Benefits of Smart Home Technology

    The benefits of smart home technology are many. First, it makes life easier by letting you control your home with little effort. Second, it saves energy by managing appliances, like adjusting the thermostat when you are home or away. Finally, it boosts security by providing real-time monitoring and alerts, giving homeowners peace of mind.

    Challenges and Considerations

    While smart home technology has many advantages, there are some challenges to think about. Different brands and devices may not always work well together, so you need to plan carefully when choosing them. Privacy and security are also big concerns, as connected devices can be at risk of cyber threats. Knowing these challenges and planning ahead can help reduce risks.

    Future Trends in Smart Home Technology

    The future of smart home technology looks bright, with trends showing more automation and use of artificial intelligence. Devices are becoming smarter, learning what users like to make better choices on their own. Also, improvements in AI are making virtual assistants like Alexa more conversational and helpful, enhancing the smart home experience.

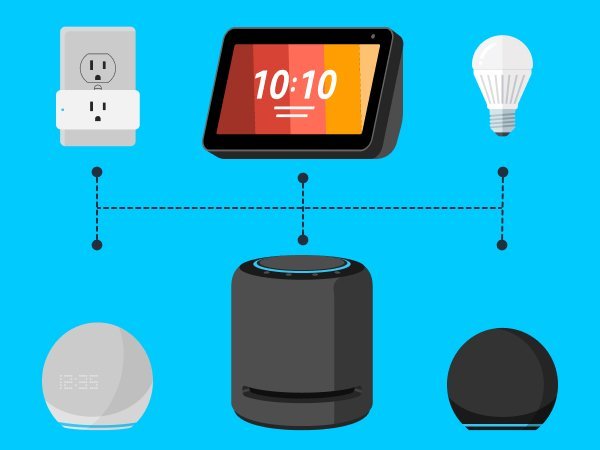
    Essential Smart Home Devices for Alexa

    To start your smart home setup, you will need some key devices that work with Alexa. Here are some popular choices:

    Smart Speakers and Displays

    Amazon Echo devices, like the Echo Dot or Echo Show, are the heart of your Alexa-enabled smart home. They listen to your commands and connect with other smart devices.

    Versatility of Echo Devices

    Echo devices come in different types, each with special features. The Echo Dot is small and affordable, making it a good choice for beginners. The Echo Show has a screen that shows videos and recipes, making it more interactive.

    Advanced Features of Smart Displays

    Smart displays like the Echo Show can be used for video calls, entertainment, and home monitoring. They work well with security cameras, letting you see live feeds. They can also show weather updates, calendars, and more, acting as a central information hub.

    Smart Lighting

    Smart bulbs and light strips from brands like Philips Hue or LIFX can be controlled by Alexa. You can adjust brightness, change colors, and set schedules easily.

    Creating Ambience with Smart Lighting

    Smart lighting helps you create different moods by changing brightness and color. Whether you want a cozy evening or a lively party, you can set the lighting to match. With Alexa, you can control the lights with your voice, making it simple to change settings.

    Energy Efficiency and Scheduling

    A big benefit of smart lighting is energy efficiency. By scheduling lights to turn on or off at certain times, you can save energy. Features like motion detection make sure lights are only on when needed, which helps save even more energy.

    Smart Plugs

    Smart plugs let you control appliances by turning them on or off with voice commands or your smartphone. They are an easy way to make your devices smarter.

    Simple Automation with Smart Plugs

    Smart plugs are a cheap way to automate older appliances. By using a smart plug, you can control power from anywhere. This lets you automate tasks like turning on a coffee maker or lamp, making life easier without spending much.

    Monitoring Energy Usage

    Many smart plugs have energy monitoring features. They show how much power connected devices use. This information helps you find energy hogs and use less energy, making your home more efficient.

    Smart Thermostats

    A smart thermostat, like the Nest Learning Thermostat or Ecobee, can be controlled with Alexa. It helps keep your home at the right temperature while saving energy.

    Intelligent Climate Control

    Smart thermostats learn what you like and adjust settings on their own. They keep you comfortable while saving energy. – Geofencing can detect if you are home or away.

    • It can adjust the temperature to save energy.
    • This helps you stay comfortable.

    Integration with Alexa Routines

    Smart thermostats work well with Alexa routines, allowing for easy automation. For example, a “Good Morning” routine can adjust the thermostat, turn on lights, and start a coffee maker with one command. This makes your morning easier.

    Smart Security Systems

    For better home security, think about using Alexa-compatible security cameras and alarm systems. Brands like Ring and Arlo offer products that work well with Alexa for voice control and alerts.

    Comprehensive Home Monitoring

    Smart security systems let you monitor your home in real-time. They send alerts to your smartphone if something unusual happens. With Alexa, you can control cameras and alarms using your voice. This makes it simple to check security feeds or arm and disarm systems.

    Enhancing Security with Automation

    Automation in smart security systems boosts your protection. For instance, you can set routines to turn on lights or play sounds when motion is detected. This can scare off intruders. Plus, connecting with other smart devices helps create a complete home security plan.Set Up a Smart Home with Alexa

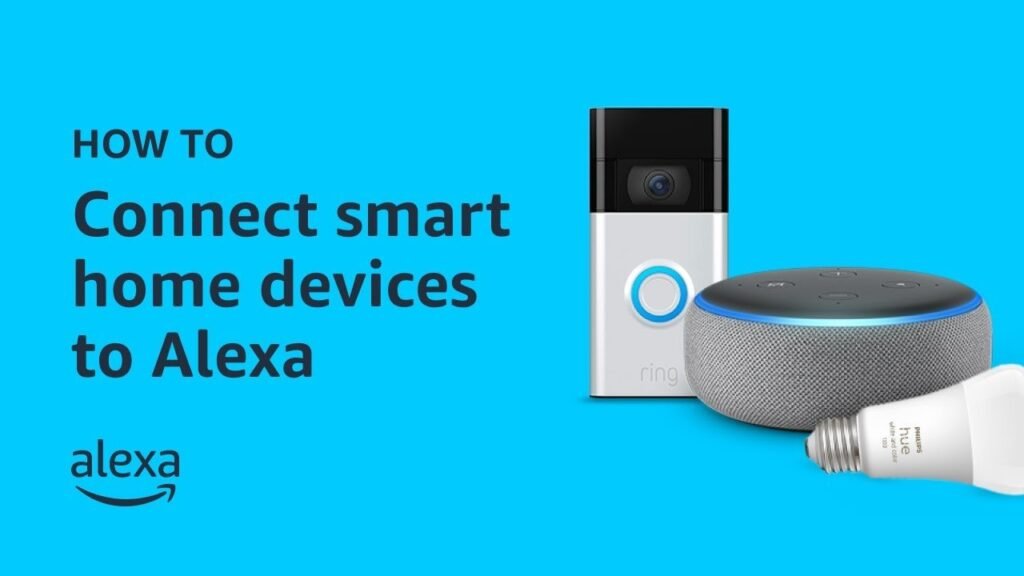
    Setting Up Your Smart Home with Alexa

    Once your devices are ready, follow these steps to set up your smart home with Alexa.

    Step 1: Set Up Your Amazon Echo Device

    To start, set up your Amazon Echo device:

    1. Plug in your Echo device and download the Amazon Alexa app on your smartphone.
    2. Open the app and follow the instructions to connect your Echo to your Wi-Fi.
    3. Once connected, the app will help you with basic settings, including teaching Alexa your voice.

    Positioning Your Echo Device

    Where you place your Echo device is important for good performance. Put it in a central spot, away from walls or other objects, so it can hear your voice clearly. Also, think about where your smart devices are located. Make sure the Echo is close enough to communicate with them.

    Customizing Alexa’s Responses

    After setting up your Echo, you can change how Alexa responds to you. You can adjust settings like the wake word, voice recognition, and language. Personalizing these features makes it easier to interact with Alexa and fits your lifestyle better.

    Step 2: Connect Smart Devices to Alexa

    1. Make sure your smart devices are set up and turned on.
    2. In the Alexa app, go to the Devices tab and tap the “+” icon to add a new device.
    3. Follow the prompts to find and connect your new smart device.
    4. Give names to your devices to make voice commands easier, like “Living Room Light” or “Front Door Camera.”

    Troubleshooting Device Connectivity

    If a device won’t connect, check if it works with Alexa. Look for any firmware updates. Restart the device and your Echo if needed. Sometimes, resetting the device to factory settings and starting the pairing process again can fix connection problems.

    Streamlining Device Management

    Organizing devices in the Alexa app makes it easier to manage them. Use the app to assign devices to specific rooms. This helps with group commands. Naming devices based on their location or function makes voice commands simple and effective.

    Step 3: Create Routines and Groups

    To improve your smart home experience, create routines and groups:

    • Routines let you trigger many actions with one command. For example, saying “Alexa, good night” can turn off lights and lock doors.
    • Groups let you control several devices at once. For instance, grouping all your living room lights lets you command them together.

    Designing Effective Routines

    Creating routines can greatly improve automation. Think about your daily activities and how automation can help. For example, a “Morning Routine” could adjust the thermostat, turn on lights, and play news updates to help you start your day.

    Experimenting with Group Commands

    Experiment with group commands to make controlling multiple devices easier. By grouping devices by function or location, you can run commands more efficiently. For example, a “Movie Time” group could dim the lights, adjust the thermostat, and turn on the TV with one command.

    Step 4: Explore Alexa Skills

    Alexa Skills are like apps for your Echo device. They add new features. You can enable skills to order food, get news, or play games. Just browse the Skills section in the Alexa app and enable the ones you like.

    Discovering New Skills

    Regularly check the Alexa Skills store to find new features. Skills range from productivity tools to entertainment options. They keep adding new capabilities to your Echo device. Reading user reviews can help you find the best and most reliable skills.

    Customizing Your Skills Portfolio

    Choose a selection of skills that match your interests and needs. You can make your Alexa device more helpful for your life. You can customize your skills portfolio. This can include fitness tips, cooking advice, or educational content.

    Ensuring Security and Privacy in Your Smart Home

    While smart homes are convenient, it’s important to think about security and privacy.

    Update Devices Regularly

    Keep your devices’ firmware updated to protect against security risks. Regular updates give you the latest security patches.

    Setting Up Automatic Updates

    Whenever you can, turn on automatic updates for your devices. This keeps them updated with the newest security features. Check manufacturer websites often for any extra patches that may not update automatically.

    Managing Voice Recordings

    Alexa records your interactions to make its service better. You can manage and delete these recordings in the Alexa app under Settings > Alexa Privacy.

    Balancing Convenience and Privacy

    Think about which recordings you need for the device to work and which ones can be deleted. Regularly reviewing and deleting unneeded recordings helps balance convenience and privacy, ensuring your data is safe.

    Securing Your Network

    Make sure your home network is secure by using a strong, unique password and turning on network encryption. You might also set up a guest network for smart devices to keep them separate from your main devices.

    Implementing Advanced Security Measures

    Consider adding extra security measures, like firewall settings and VPNs, to protect your network. Regularly update your router’s firmware. Check connected devices to make sure no unauthorized devices have access.

    Troubleshooting Common Issues

    Even with careful setup, you may face problems. Here are some common issues and their solutions:

    • Device Not Responding: Ensure the device is powered on and connected to the right Wi-Fi network.
    • Alexa Not Understanding Commands: Use the Voice Training feature in the app to help Alexa recognize your voice better.
    • Connectivity Issues: Restart your router and make sure your Echo device is close to your Wi-Fi network.

    Diagnosing Device Issues

    If devices are unresponsive, check for software updates and confirm network connectivity. Physical obstructions or interference from other devices can affect performance. Assessing your environment can help find issues.

    Enhancing Voice Recognition

    Improving voice recognition can make Alexa more responsive. Hold regular voice training sessions in the Alexa app to improve understanding. Speaking clearly and using specific commands can also help with better recognition.

    Conclusion

    Setting up a smart home with Alexa can make your life easier and more efficient. By following these steps, you can create a smart home that is secure and simple to manage. Whether you are changing the thermostat or locking your doors, Alexa lets you control your devices with your voice. Enjoy turning your living space into a modern, connected home.

    Check Also  https://www.theverge.com/23751608/amazon-alexa-smart-home-controller-how-to

  • Top SDK for In-App Advertising: Maximize Revenue

    Top SDK for In-App Advertising: Maximize Revenue

    Best SDK for In-App Advertising

    In-app advertising has changed the mobile app industry. It gives developers a way to make money from their apps. This process involves adding ads directly into the app. This allows developers to earn revenue while keeping users engaged. However, choosing the right Software Development Kit (SDK) for in-app advertising can be tough. With many options available, you need to think carefully about which SDK fits your needs.

    This article will explore the best SDKs for in-app advertising. It will highlight their features, ease of integration, and benefits. Whether you want to boost app revenue or simplify advertising, these SDKs can help you reach your goals.

    Understanding In-App Advertising

    In-app advertising means showing ads within a mobile app. This practice is now a key part of how apps make money. Ads can come in different formats, each serving different purposes and audience needs.

    Types of In-App Ads

    1. Banner Ads: These are images that show up at the top or bottom of the screen. They are less intrusive, but their success depends on good placement and design.
    2. Interstitial Ads: These are full-screen ads that appear at natural breaks in the app. They can engage users well but should be used carefully to avoid annoying them.
    3. Video Ads: These ads are often interactive and can be skippable or not. They provide an engaging experience that can lead to more conversions.
    4. Native Ads: These ads blend into the app’s content, matching its style. They are less disruptive and can improve user engagement when done right.

    Why SDKs Are Essential for In-App Advertising

    SDKs are important for making it easier to add advertising features to mobile apps. They give developers tools and resources. These include libraries and guides. These resources help developers add ads, track performance, and manage ad inventory easily.

    1. Integration Efficiency: SDKs make it easy to add ads to your app. This ensures the process is smooth and does not slow down the app.
    2. Performance Tracking: SDKs come with built-in analytics. They give detailed insights into how ads perform, helping developers make smart choices to boost revenue.
    3. Ad Inventory Management: Many SDKs have features to manage ad inventory. This helps show the right ads to the right users at the right time.
    4. Maximizing Revenue: By choosing the right SDK, developers can increase ad revenue while keeping the app user-friendly.Top SDK

    Top SDKs for In-App Advertising

    Choosing the right SDK can greatly affect your in-app advertising success. Here are some of the best SDKs known for their features:

    1. Google Mobile Ads SDK

    The Google Mobile Ads SDK is a flexible tool. It supports various ad types. These include banner ads, interstitial ads, and rewarded video ads. This SDK is well-known for its strong analytics and performance tracking. These features help developers improve ad placements. As a result, they can increase their revenue.

    Key Features

      • Multiple Ad Formats: Supports many ad formats, giving flexibility in how ads are shown and how users engage.
      • Seamless Google Integration: Works easily with Google Analytics, creating a single platform for tracking ad performance.
      • Advanced Targeting Options: Provides smart targeting features to help ads reach the right audience.

      The SDK has great support and clear documentation. This makes it a good option for both new and experienced developers.

      2. Facebook Audience Network SDK

      The Facebook Audience Network SDK brings Facebook’s strong advertising network to mobile apps. It offers high-quality ads that fit well with your app’s design.

    Key Features

      • Access to a Large Ad Network: Uses Facebook’s wide ad network, giving access to many advertisers and ad types.
      • High-Quality Native Ads: Makes sure ads fit the app’s look, improving user engagement and satisfaction.
      • Smart Targeting and Analytics: Uses Facebook’s user data for accurate targeting and detailed analytics.

      This SDK can greatly increase your app’s ad revenue by using Facebook’s large user data. It ensures a smooth and profitable user experience.

      3. Unity Ads SDK

      The Unity Ads SDK is made for mobile game developers. It allows easy integration of video ads that fit the gaming experience without interruptions.

      Key Features

      • Interactive Video Ads for Games: These are fun video ads that make playing games more enjoyable. They help keep players interested and coming back to the game.
      • Detailed Analytics and Reporting: Provides tools for analytics and reporting, helping developers track ad performance and improve strategies.
      • Easy Unity Engine Integration: It works well with the Unity engine. This makes ads feel like a natural part of the game, not a distraction.

      The Unity Ads SDK makes sure ads are not just an afterthought. They become a key part of the gaming experience, boosting both engagement and revenue.

    Choosing the Right SDK for Your App

    Choosing the right SDK is important for your app’s needs and your business goals. Here are some key factors to consider:

    Compatibility and Integration

    Compatibility and easy integration are crucial when picking an SDK. Make sure the SDK works with your app’s platform, like iOS or Android, and fits well with your current code. SDKs that are well-documented and have active community support can make integration easier and help avoid technical issues.

    Ad Formats and Revenue Potential

    The types of ads that fit your app’s design and user experience matter a lot. Some SDKs provide many ad formats, while others focus on specific types like video or native ads. It’s important to evaluate how much revenue each ad format can bring in, based on user preferences and engagement.

    Analytics and Reporting

    Strong analytics and reporting features are essential for tracking ad performance. Look for SDKs that provide detailed analytics tools to monitor key metrics like impressions, clicks, and conversion rates. This will help you improve your advertising strategy effectively.

    Security and Compliance

    In-app advertising involves handling sensitive user data. This makes security and compliance very important. Choose SDKs that follow industry standards and regulations. This helps protect user data and addresses privacy concerns. Doing this builds user trust and reduces legal risks.

    Implementing In-App Advertising: Best Practices

    To make the most of in-app advertising, follow these best practices:

    Optimize Ad Placement

    Place ads strategically to maximize visibility without disrupting the user experience. Ads should be easy to see but not annoying. Avoid overwhelming users with too many ads, as this can frustrate them and lead to app uninstalls. Use A/B testing to find the best ad placements for your app.

    Focus on User Experience

    Make sure ads improve the user experience. Choose ad formats that fit your app’s design and offer real value to users. For example, rewarded video ads that give in-app rewards can boost user satisfaction and retention. Aim for a good balance between making money from ads and keeping users engaged.

    Monitor and Adjust

    Regularly checking ad performance is important for increasing revenue. Use the analytics tools in your SDK to track key metrics and find areas to improve. Be proactive in making changes based on performance data. This will help keep your advertising strategy effective and aligned with your business goals.

    Conclusion

    Choosing the right SDK for in-app advertising is a key decision for app developers who want to make money from their apps. By understanding the features and benefits of popular SDKs, you can make a good choice for your business. Some top SDKs include Google Mobile Ads, Facebook Audience Network, and Unity Ads. This will help you meet your business goals and enhance user experience.

    Remember, successful in-app advertising is more than just making money. It means creating a balanced system where ads support the app’s function and add value for users. With the right SDK and best practices, you can achieve this balance and boost your app’s success.

  • Publish App on Google Play Store: Step-by-Step Guide

    Publish App on Google Play Store: Step-by-Step Guide

    How to Publish Your App on Google Play Store

    Publishing your app on the Google Play Store is an important step to reach a global audience. It lets you show your app to millions of Android users. In this guide, we will break down the process into simple steps to help you publish your app easily.

    Preparing Your App for Launch

    Before you publish your app, make sure it is ready for the public. This means testing your app, preparing all necessary materials, and following Google Play’s rules.

    Testing Your App

    Testing is a key step to ensure your app works well and is free of major bugs. Start by doing unit tests to check each part of your app. Then, do integration testing to make sure all parts work well together. Test on different devices and Android versions to find compatibility issues.

    Consider using automated testing tools to save time and catch problems that manual testing might miss. These tools can mimic user actions and give detailed reports on how your app performs. Along with automated testing, use beta testers to get real feedback. Beta testing helps find bugs and gives insights into user experience and possible improvements.

    Preparing App Assets

    Your app’s assets include the icon, screenshots, and promotional graphics. These elements are important because they are the first things potential users will see. Start by designing a strong app icon. It should be simple, memorable, and represent your brand well. A good icon can greatly affect the first impression of your app.

    Screenshots should show key features and functions of your app. Use captions on screenshots to explain features clearly. You might also create a short promotional video. This video can engage users and give a quick overview of your app. It can be especially effective on the Play Store, as it offers a dynamic preview of what to expect.

    Ensuring Compliance with Google Play Policies

    Following Google Play’s policies is necessary for your app to be accepted. Get to know the Google Play Developer Policies. These cover user data privacy, advertising rules, and prohibited content. Make sure your app follows these guidelines to avoid rejections during the review process.

    Also, ensure your app’s privacy policy is clear and easy to understand. This should explain how user data is collected, used, and protected. If your app has ads, make sure they follow Google’s ad policies and do not disrupt the user experience. Regularly check for policy updates to keep your app compliant after launch.

    Creating a Google Play Developer Account

    To publish your app, you need to create a Google Play Developer Account. This account lets you manage your apps, track performance, and earn revenue.

    Steps to Create an Account

      1. Visit the Google Play Console: Go to console and sign in with your Google account. Use an account you want for your app development projects.
      2. Register as a Developer: Fill out the required information, including your developer name and email address. Pay the registration fee, which is a one-time payment. This fee is $25 and gives you lifetime access to the Play Console.
      3. Accept Developer Agreement: Review and accept the Developer Distribution Agreement to finish setting up your account. This agreement explains the rules for distributing apps on the Google Play Store. Make sure you read and understand these rules.

      Setting Up Developer Profile

      After creating your account, set up your developer profile. This includes adding your developer name, email, and website if you have one. Your profile is visible to users, so make it professional and reflect your brand.

      Make sure your contact information is correct and current. This is important for getting notifications from Google and for users to reach you about your app. Think about adding a support email for user questions and feedback.

      Managing Payment Information

      If you want to sell paid apps or in-app purchases, set up your payment information. Go to “Payment Settings” in the Google Play Console. Here, you can add your bank account details to receive payments. Make sure all information is correct to avoid payment delays.

      Think about your app’s pricing strategy. – You can choose a one-time purchase, a subscription, or in-app purchases.

      • Make sure your choice aligns with your revenue goals.
      • Also, consider what your audience prefers. Regularly check your pricing strategy based on market trends and user feedback.Google Play Store

    Setting Up Your App in the Google Play Console

    Once your developer account is active, you can add your app to the Google Play Console.

    Creating a New Application

    1. Select “All Apps”: From the Google Play Console dashboard, click on “All Apps” and then “Create App.” This starts the process of setting up your app on the Play Store.
    2. Enter App Details: Provide your app’s name, choose the default language, and say if it is a game or an app. The app name is important for search visibility and attracting users.
    3. Set App Categories: Pick the category that best fits your app to help users find it easily. Choosing the right category is key for your app’s discoverability. You can also add tags to refine your app’s categorization.

    Filling Out the Store Listing

    The store listing is where you share information about your app with users. This includes the app’s title, description, screenshots, and more.

    1. Title and Description: Write a clear and engaging title and description that show your app’s features and benefits. Use keywords wisely to improve search visibility. Keep the description short but informative to keep user interest.
    2. Graphics and Video: Upload your app icon, feature graphic, and a promotional video (optional but recommended). Feature graphics should be eye-catching and show your app’s main functions. A good promotional video can boost user engagement and conversion rates.
    3. App Details: Fill out other required fields like contact details and privacy policy. The privacy policy should be clear and easy to find, explaining how you handle user data. Providing complete contact details helps users reach you for support or feedback.

    Configuring App Localization

    Localization is important for reaching a global audience. Think about translating your app’s store listing into different languages. This means translating the app title, description, and even the app content if needed. Localization makes the user experience better and can increase downloads in non-English speaking areas.

    Use professional translation services to ensure accuracy and cultural relevance. Be aware of local rules and cultural details that might affect your app’s acceptance in different places. Regularly update translations with new app updates to keep everything consistent.

    Uploading Your App Bundle

    The next step is to upload your app’s APK or App Bundle. This is the file that users will download and install on their devices.

    Generating an App Bundle

    1. Use Android Studio: Open your project in Android Studio. Click “Build” from the menu and select “Build Bundle(s) / APK(s)” > “Build Bundle.” This creates a package ready for the Play Store.
    2. Sign Your App: Make sure your app is signed with a release key. This is important for updates and security. A signed app shows users it is authentic and is needed for publishing on the Play Store.
    3. Test the App Bundle: Before uploading, test the app bundle on different devices. This helps find any last-minute issues. Use the Android Emulator or real devices to do thorough testing.

    Uploading to the Console

      1. Go to “Release”: In the Google Play Console, click on “Release” > “Production” > “Create New Release.” This section helps you manage your app’s versions and stages.
      2. Upload Your App: Drag and drop your App Bundle file into the console. The console will check the app for errors. Fix any warnings or errors before moving on to ensure a smooth release.
      3. Review and Release: After uploading, check the release details and click “Save” or “Review” to continue. Look for any final issues and make sure all details are correct. When you are happy, click “Start Rollout” to begin the app’s release.

      Managing App Versions

      The Google Play Console helps you manage different versions of your app. Use this feature to track changes and improvements. For each new version, update the version code and name in the app’s build.gradle file.

      Think about using staged rollouts to release your app slowly. This method helps find issues with a smaller group of users before a full release. Watch feedback and crash reports during this time to make needed changes.

      Setting App Pricing and Distribution

      Decide if you want your app to be free or paid. You can also choose where it will be available in different countries.

    Pricing and Availability

      1. Select Pricing: Choose if your app will be free or paid. Once your app is free, you cannot change it to paid. Think about the pros and cons of each option for getting users and making money.
      2. Select Countries: Decide where your app will be available. Keep your target audience in mind. Research market trends and user preferences in each area to improve app distribution.
      3. Implement In-App Purchases: If needed, set up in-app purchases to earn more money. Clearly explain what users get with each purchase and make sure prices are fair. Track how in-app purchases perform and change offerings based on user feedback and sales data.

      Setting Up Subscriptions

      If your app has subscription services, set them up in the Google Play Console. Define the subscription levels, prices, and billing times. Give users details about what each subscription level includes.

      Make sure the subscription model is clear and easy for users to manage. Offer trial periods to help users try premium features. Regularly check subscription performance and make changes to keep users and increase revenue.

      Configuring App Distribution Options

      Besides pricing, think about other ways to distribute your app to reach more users. For example, you can offer your app to schools and businesses through Google Play for Education and Google Play for Work. Adjust your app’s features and licenses to fit these markets.

      Also, look into the benefits of joining Google Play’s promotional programs. These programs can boost your app’s visibility and attract more users. Stay updated on new distribution options and trends to remain competitive in the market.

    Reviewing and Publishing Your App

    Before your app goes live, do a final review to make sure all information is correct and complete.

    Conducting a Final Review

    1. Check Store Listing: Make sure all information is correct and well-formatted. Look at the app’s title, description, and images to show your app’s value.
    2. Verify App Functionality: Check that the app works well on all devices and Android versions. Test key features and user paths for a smooth experience.
    3. Compliance Verification: Review Google Play’s policies to ensure your app follows all guidelines. Make any needed changes before submission to avoid delays.

    Publishing Your App

    When everything is ready, click “Publish” on your app’s dashboard. Google will review your app to check for policy compliance. This can take a few hours to a few days. Once approved, your app will be live on the Google Play Store.

    Be patient during the review process, as Google’s team carefully checks each submission. When your app is live, celebrate your success but stay proactive. Use this time to plan marketing strategies and future updates.

    Preparing for Launch Day

    On launch day, connect with your audience through social media and email. Announce that the app is available. Encourage users to download it and share their experiences. Respond quickly to feedback to show you value their input.

    Think about offering promotions or discounts to attract early users. This can create excitement and boost downloads. Check early performance metrics to see how users are reacting and find areas to improve.

    Post-Publication: Monitoring and Updates

    After you publish, it’s important to watch your app’s performance and gather user feedback for future updates.

    Monitoring Performance

    Use the Google Play Console to track downloads, ratings, and reviews. This data helps you understand how your app is doing and where you can improve. Look at user reviews for common issues and address them quickly.

    Use analytics tools to get more insights into user behavior and how people use the app. Find out which features are popular and which ones are not getting much attention. Use this information to shape your app’s development and marketing plans.

    Regular Updates

    Regular updates are important for keeping users engaged and satisfied. Fix bugs quickly and listen to user feedback when planning new features. Aim to release updates that improve functionality and user experience.

    Share update details with users through app notifications and store listings. Highlight new features and improvements to encourage users to try the updated version. Regular updates show your commitment to a high-quality app experience.

    Engaging with Your User Community

    Connecting with your user community is vital for building loyalty and trust. Create a space for users to share feedback, ask questions, and report issues. Join user discussions and offer support when needed.

    Think about setting up a feedback loop where users can suggest features and vote on them. This helps build a sense of community and gives users a voice in your app’s development. Use surveys and polls to learn about user preferences and expectations.

    Conclusion

    Publishing an app on the Google Play Store is a smart way to reach many users. By following these steps, you can ensure a smooth publishing process and set your app up for success. Remember, the work doesn’t end once your app is live; ongoing improvement and user engagement are key to long-term success.

    Stay focused on providing value to your users and meeting their needs. Keep an eye on industry trends and innovate to stay ahead of the competition. With hard work and dedication, your app can succeed on the Google Play Store and achieve lasting success.

  • Top 10 Mobile App Monetization Strategies Explained

    Top 10 Mobile App Monetization Strategies Explained

    Top 10 Mobile App Monetization Strategies

    In-app advertising is a popular way to make money from apps. By showing ads in your app, you can earn money based on how users interact with them. There are different types of in-app ads, like banner ads, interstitial ads, video ads, and native ads. Each type has its own benefits. Choosing the right ad format can improve user experience and increase your revenue.

    Best Practices for In-App Advertising

    Choose the Right Ad Network

    Picking a good ad network is key to your in-app advertising success. Look for networks with many advertisers and a strong reputation for paying on time. Consider networks that focus on your app’s niche, as they may offer more relevant ads for your users.

    Optimize Ad Placement

    Placing ads well is important for a smooth user experience. Avoid putting ads where they might disrupt important app functions. Instead, place them in a way that feels natural and not annoying, like during loading screens or between content sections.

    Test Ad Formats

    Experimentation is key to finding the most effective ad formats for your audience. Run A/B tests with different ad types and placements to determine what generates the highest engagement without compromising user satisfaction. Regularly review performance metrics to refine your approach.

    2. Freemium Model

    The freemium model lets users download your app for free. They can also buy premium features or content. This approach attracts many users and helps turn free users into paying customers.

    Tips for a Successful Freemium Model

    Offer Valuable Free Content

    Make sure the free version of your app provides real value. It should meet users’ basic needs while leaving room for premium upgrades. This balance encourages users to check out premium options without feeling cheated.

    Highlight Premium Features

    Clearly show the benefits of upgrading to premium features. Use images and clear language to explain how these features improve the user experience. You might also use a comparison chart to show the differences between free and premium versions.

    Use In-App Prompts

    Gently remind users about available upgrades with in-app notifications. These prompts can highlight special promotions or new premium features. Make sure these notifications are well-timed and not too frequent to avoid annoying users.

    3. Subscription Model

    The subscription model brings in steady income by charging users a regular fee for app content or features. This model works well for apps that provide ongoing value, like streaming services or productivity tools.

    Implementing a Subscription Model

    Offer Tiered Pricing

    Provide different subscription options to meet various user needs and budgets. Having a basic, standard, and premium plan can attract more users. You might also offer discounts for long-term subscriptions to keep users around.

    Provide Exclusive Content

    Create content or features that only subscribers can access to boost value. Exclusive content can include early access to new features, ad-free experiences, or premium support. These benefits make the subscription more attractive.

    Regularly Update Content

    Add new content or features often to keep subscribers interested and justify the fee. Regular updates improve user satisfaction and lower cancellation rates. Talk to your audience to find out what new features or content they want.Mobile App Monetization

    4. In-App Purchases

    In-app purchases let users buy virtual goods or services inside your app. This is common in gaming apps. Users can buy items like virtual currency, characters, or power-ups.

    Maximizing In-App Purchases

    Create Desirable Items

    Make virtual goods that improve the user experience and offer real benefits. Items should look good and provide value, like better gameplay or new features. Update your inventory often to keep users engaged.

    Use Limited-Time Offers

    Encourage purchases by giving discounts or special items for a short time. Time-limited promotions create urgency, making users want to buy before the offer ends. Use these strategies carefully to keep them effective.

    Balance Gameplay

    Make sure in-app purchases do not upset the app’s balance or fairness. Avoid pay-to-win features that frustrate users who do not pay. Instead, focus on improving the experience for everyone, with optional purchases that add value without creating unfairness.

    5. Sponsorship and Partnerships

    Partnering with brands or sponsors can create new ways to earn money. By adding sponsored content or branded experiences, you can boost your app’s value.

    Building Successful Partnerships

    Identify Compatible Brands

    Choose brands that match your app’s mission and audience. This helps make sure that sponsored content feels real and connects with your users. Look for partners with similar values and customers.

    Create Unique Experiences

    Make branded experiences that fit well with your app’s content. This could include co-branded features, special sponsored content, or fun activities that engage users. The aim is to improve the app without making it feel like an ad.

    Measure Success

    Keep track of how well sponsored content performs to meet both sides’ goals. Use analytics to check user engagement and feedback. Regularly review partnership results to improve future collaborations and overall success.

    6. Paid Apps

    Charging users a one-time fee to download your app is a simple way to make money. This method may limit your users, but it helps you earn money right away.

    Strategies for Successful Paid Apps

    Offer a Free Trial

    Let users try your app before they buy it. This can help increase the number of users who decide to purchase. A trial period gives users confidence in the app’s value. Make sure the trial lasts long enough for users to explore important features.

    Focus on Quality

    Make sure your app provides great value and works well to justify the price. Good design, user experience, and unique features are important to compete with free apps. Gather user feedback to keep improving your app.

    Leverage Marketing

    Promote your app through different channels to reach more potential buyers. Use social media, content marketing, and app store optimization to get noticed. Think about working with influencers or industry experts to build trust and boost sales.

    7. Affiliate Marketing

    Affiliate marketing means promoting products or services from other companies in your app. You earn a commission for each sale made through your app. This can help you make money in different ways.

    Effective Affiliate Marketing

    Choose Relevant Products

    Promote products that fit your app’s audience and improve their experience. The more the products match user interests, the more likely they are to buy. Do some market research to find products that appeal to your audience.

    Disclose Partnerships

    Be open about your affiliate relationships to keep user trust. Clearly label affiliate links and provide disclosures when needed. Being transparent builds credibility and encourages users to check out the products you promote.

    Track Performance

    Monitor the success of affiliate marketing efforts to optimize future campaigns. Use analytics to track click-through rates, conversions, and overall revenue. Regularly review these metrics to refine your strategy and improve performance.

    8. Data Monetization

    Data monetization means collecting and selling anonymized user data to other companies. This strategy needs careful attention to privacy rules and user consent.

    Implementing Data Monetization

    Ensure Compliance

    Follow privacy laws, like GDPR, when collecting and selling data. Learn about the legal rules to avoid fines and protect your brand. It may help to talk to legal experts to ensure you comply fully.

    Obtain User Consent

    Clearly explain how you collect data and get explicit user consent. Being open about data collection builds trust and encourages users to agree. Give users easy options to manage their data preferences.

    Prioritize Privacy

    Anonymize and group data to keep user identities safe. Use strong security measures to protect data from unauthorized access. Regularly check and update privacy policies to match current practices and rules.

    9. Crowdfunding

    Crowdfunding lets people support your app’s development in exchange for rewards or early access to features. This method helps build a community of engaged users.

    Tips for Crowdfunding Success

    Create a Strong Campaign

    Clearly explain your app’s value and goals to potential backers. Use engaging visuals and stories to grab attention and share your vision. Show how their support will help your app grow.

    Offer Great Rewards

    Give incentives that your target audience will love. Rewards can include exclusive content, merchandise, or recognition in the app. Make sure rewards are meaningful and can be delivered on time.

    Connect with Supporters

    Keep in touch with backers to build loyalty and trust. Regular updates on progress, challenges, and milestones keep supporters interested in your journey. Create a sense of community by encouraging feedback and involvement in decisions.

    10. Licensing

    Licensing your app’s technology or content to other businesses can help you earn money and reach more users. This strategy works well for apps with unique features or special technology.

    Licensing Considerations

    Identify Potential Licensees

    Look for businesses that can use your app’s technology or content. Think about industries that match your app’s strengths and need similar solutions. Networking and attending industry events can help you find potential partners.

    Negotiate Terms

    Create clear licensing agreements that explain usage rights and how revenue will be shared. Be specific about how the technology can be used, how long the agreement lasts, and any exclusivity terms. Work with legal experts to make sure the agreements protect your interests.

    Protect Intellectual Property

    Get any necessary patents or trademarks to protect your app’s assets. Protecting your intellectual property is important to stop others from using or copying your technology. Keep an eye on the market to find and address any possible infringements.

    By using one or more of these monetization strategies, you can effectively earn money from your mobile app. Choose the strategies that fit your app’s goals and audience to increase your chances of success.

    Check Also  https://www.nimbleappgenie.com/blogs/app-monetization/

  • How to Build an Android App with No Code

    How to Build an Android App with No Code

    Effortless No Code Android App Development Guide

    Creating an Android app no longer needs a lot of coding knowledge. No-code development platforms make it easy. With these tools, you can build functional and attractive apps without writing any code. This is useful for IT managers in small to medium businesses (SMEs). They want to improve operations. They also want to optimize cloud services. This can be done without spending a lot on developers.

    In this guide, we will show you how to build an Android app using no-code platforms. We will discuss the benefits, the tools you can use, and a step-by-step guide to help you get started.

    Why Choose No-Code App Development?

    No-code development platforms have many advantages, especially for IT managers who want to improve efficiency and save money:

    1. Time Efficiency

    Building an app from scratch with traditional coding can take months. This process often includes a lot of planning, development, and testing. No-code platforms cut down development time, letting you launch your app quickly. This fast development cycle helps you meet project deadlines and take advantage of market opportunities.

    2. Cost-Effectiveness

    Hiring developers can be costly. The costs go up based on how complex and long the project is. No-code tools remove the need for a big development team, which saves money. Many no-code platforms also offer affordable subscription plans for small and medium-sized businesses. This makes app development cheaper without losing quality.

    3. Accessibility

    These platforms are easy to use. They are made for people who do not have programming skills, making app development open to everyone. They usually have simple interfaces and ready-made templates that make the process easier. This ease of use helps teams quickly test ideas and create prototypes, encouraging innovation in companies.

    4. Flexibility and Scalability

    With no-code tools, you can easily update and grow your app as your business changes. These platforms let you change features, add new functions, and increase user capacity without a lot of extra work. This ability to grow helps your app keep up with your business. It can adapt to changing user needs. This keeps your app important in a competitive market.

    Choosing the Right No-Code Platform

    Many no-code platforms focus on Android app development. Here are some popular choices:

    1. AppGyver

    AppGyver offers a strong no-code platform for building apps using a visual editor. It is great for making complex apps with advanced features. With AppGyver, you can use its Composer Pro tool to design detailed app logic and user interfaces. This platform supports many integrations, helping your app connect easily with different databases and third-party services.

    2. Thunkable

    Thunkable is easy to use and has drag-and-drop features, making it perfect for beginners. It is a good choice for quickly developing simple apps. Thunkable has strong community support and many tutorials, helping users learn and solve problems easily. Its cross-platform features ensure that your app works well on both Android and iOS devices, expanding your app’s reach.

    3. Adalo

    Adalo is known for being user-friendly and for its integration options. It lets you create apps with custom designs and features. The platform has a library of pre-built components for common app functions, saving time on custom solutions. Adalo can connect with external APIs, allowing for better data management and improving app functionality and user experience.

    4. Kodular

    Kodular offers a complete set of tools for building Android apps. It works well for beginners and those with some tech skills. Kodular uses a block-based coding system that is easy to learn. This platform also has ways to make money through ads and in-app purchases.Android App with No Code

    Step-by-Step Guide to Building Your Android App

    Now that you’ve picked a no-code platform, let’s start the app development process.

    Step 1: Define Your App’s Purpose and Features

    Before you begin, clearly state what you want your app to do. List the main features that will help your users and meet your business goals. Make a list of must-have features and nice-to-have features to focus your development. This will help guide your design and ensure your app works well.

    Step 2: Design Your App’s User Interface

    Most no-code platforms have a visual editor for designing your app’s user interface (UI). Use drag-and-drop tools to place buttons, text fields, and images. Make sure the design is easy to use. Follow design principles like consistency, simplicity, and accessibility to improve user experience. Test your design with potential users to get feedback and make changes.

    Step 3: Add Functionality

    Once your UI is ready, it’s time to add features. No-code platforms have pre-built components and logic blocks for this. For example, you can add user login, connect to cloud databases, or set up push notifications. Check the platform’s library to find features that can improve your app. Make sure the app’s logic meets user needs and business goals.

    Step 4: Test Your App

    Testing is an important part of app development. Use the platform’s testing tools to mimic user actions and find any bugs. It’s vital to ensure your app works well on different Android devices. Test thoroughly to confirm that all features work as they should and that the app gives a smooth user experience. Get feedback from beta users to find ways to improve.

    Step 5: Publish Your App

    When you are happy with your app’s performance, it’s time to publish it on the Google Play Store. Follow the platform’s rules for app submission. This includes making an app listing with a description, screenshots, and tags. Make sure your app follows Google Play’s policies. Prepare marketing materials to promote your app and connect with your audience effectively.

    Best Practices for No-Code App Development

    To maximize the benefits of no-code app development, keep these best practices in mind:

    1. Focus on User Experience

    Prioritize a simple and user-friendly design to boost user satisfaction and engagement. A good user experience encourages people to use the app and keeps them coming back, which helps the app succeed. Regularly collect user feedback to find areas for improvement and update your design to meet user needs.

    2. Use Integrations

    Make the most of the platform’s integration features to connect your app with other tools and services your business uses. Integrations improve the app’s functionality and allow smooth data sharing between systems. Look at potential integrations based on how well they can simplify business processes and add value for users.

    3. Keep It Updated

    Regularly update your app to fix bugs, enhance performance, and add new features based on user feedback. Updates show your commitment to a high-quality app experience and encourage users to stay engaged. Plan a regular update schedule to keep your app competitive and relevant in the market.

    4. Track Performance

    Use analytics tools to monitor your app’s performance and user behavior. This data can help guide future updates and improvements. Look at metrics like user retention, engagement, and conversion rates to see how users interact with your app. Use these insights to make smart decisions and improve your app’s performance over time.

    Conclusion

    Building an Android app without coding is a big change for IT managers. It helps them improve their operations easily and affordably. You can create powerful apps using no-code platforms. Examples include AppGyver, Thunkable, Adalo, and Kodular. You don’t need many coding skills to use these tools.

    Embrace the future of app development. Give your business the tools to grow and adapt in a fast-changing digital world. No-code app development helps you improve your internal processes. It also allows you to offer new services to customers. This approach gives you the flexibility and scalability you need to succeed.

    Check Also  https://zapier.com/blog/best-no-code-app-builder/

  • How to Track Affiliate Clicks with Google Tag Manager

    How to Track Affiliate Clicks with Google Tag Manager

    Track Affiliate Clicks: Google Tag Manager Guide

    Tracking affiliate clicks accurately is very important for any business in affiliate marketing. Google Tag Manager (GTM) helps you manage tracking easily. You don’t need to edit your website’s code. This article will help you set up GTM. You will learn how to track affiliate clicks. These steps will help you improve your marketing efficiency.

    Why Use Google Tag Manager?

    Google Tag Manager is a helpful tool. It allows you to manage JavaScript and HTML tags. These tags are used for tracking and analytics on your website. By using GTM, you can:

    Simplify Code Management

    With GTM, you do not need to manually change your website’s code every time you want to add or update a tag. This lowers the chance of mistakes and makes it easier for non-developers to manage tracking. The easy-to-use interface lets you manage tags in one place, ensuring that changes are made consistently across your site.

    Improve Efficiency

    GTM lets you quickly add tracking codes and updates without needing a developer. This means marketing teams can launch campaigns faster and react to changes right away. Managing tags by yourself makes your marketing strategy more flexible. This helps teams concentrate on improving performance. They won’t get bogged down by technical issues.

    Enhance Flexibility

    Easily test and debug tags before going live with GTM’s built-in tools. This helps you find and fix problems before they impact your data collection. GTM is also flexible and works with many analytics and marketing platforms. This makes it a useful tool for your digital marketing efforts.

    Centralized Tag Management

    GTM offers a central place to manage all your tracking tags. This makes it easier to keep track of different codes. A centralized system reduces duplication and keeps all team members informed about tracking and analytics.

    Cost-Effective Solution

    GTM is a free tool from Google, making it a budget-friendly option for businesses of any size. You can handle complex tracking needs without spending money on costly third-party tools. This is especially good for startups and small businesses with tight budgets.

    Google Tag Manager has many benefits. It is a good option for tracking affiliate clicks. It also helps you gather important data for your affiliate marketing.Affiliate Clicks

    Setting Up Google Tag Manager for Tracking Affiliate Clicks

    Step 1: Create a Google Tag Manager Account

    If you haven’t done so, you need to create a GTM account:

    Sign Up

    Begin by visiting the GTM website at https://tagmanager.google.com/ and signing in with your Google account. The sign-up process is simple, so you can quickly start setting up your tracking system.

    Create Account

    Once signed in, click on “Create Account.” Enter your account name, which should reflect your business or organization. Choose your country from the dropdown menu to make sure your account settings follow local rules.

    Set Up Container

    After creating your account, the next step is to set up a container. Enter a clear container name, usually your website URL, to help with identification. Select “Web” as the target platform for tracking activities on your website.

    Step 2: Install GTM on Your Website

    Once your account and container are ready, you need to install GTM on your website:

    Copy the GTM Code

    After setting up your container, GTM will give you two snippets of code. These codes are important for connecting GTM with your website and ensuring accurate data collection.

    Insert the Code

    Paste the first code snippet right after the opening tag in your website’s HTML. This placement helps GTM load early and capture all important data. Next, add the second snippet right after the opening tag. Properly placing these codes is essential for GTM to work correctly.

    Verify Installation

    After adding the code snippets, check the installation by looking at your website’s source code. This step makes sure the tags are placed correctly and that GTM is ready to manage your tracking needs. Use browser developer tools to look for any errors or issues with the code placement.

    Step 3: Create a Click Trigger

    To track affiliate clicks, you need to create a trigger that activates when a specific event happens.

    Navigate to Triggers

    In your GTM workspace, go to the “Triggers” section and click on “New” to create a new trigger. Triggers are the conditions that decide when your tags should fire. They are a key part of your tracking setup.

    Select Trigger Type

    Choose “Click” as the trigger type and select “All Elements.” This lets you track clicks on any part of your website. It gives you flexibility in capturing different user actions.

    Configure Trigger

    Set this trigger to fire on “Some Clicks.” Define the conditions, like clicks on links that have your affiliate URL. By doing this, you ensure that only important clicks are tracked, which reduces noise in your data.

    Test Trigger Conditions

    Before you finish setting up the trigger, test the conditions. This ensures they capture the right events. This step helps you avoid tracking irrelevant actions that could mess up your data.

    Use Custom Variables

    Think about using custom variables to make your triggers more precise. These variables let you capture dynamic data, like user details or session info. This gives you better insights into user behavior.

    Step 4: Set Up a Tag

    With your trigger ready, the next step is to create a tag that sends data to your analytics platform.

    Access the Tags Section

    Click on “Tags” in your GTM workspace and select “New” to create a tag. Tags are code snippets that send data to your analytics platform. Setting them up correctly is important for accurate tracking.

    Choose Tag Type

    Select “Google Analytics: Universal Analytics” or another analytics tool you are using. GTM supports many tag types, so you can integrate with different platforms based on your needs.

    Configure Tag

    Set the track type to “Event.” Fill in the event tracking parameters like Category, Action, and Label. These parameters help organize your data and make it easier to analyze user actions.

    Link the Trigger

    Attach the click trigger you created earlier to this tag. Linking the trigger ensures that the tag fires only when the right conditions are met. This provides precise and accurate data collection.

    Set Up Additional Tracking

    Think about setting up more tags to capture other important metrics, like pageviews or form submissions. This approach gives you a complete view of user behavior and improves your overall tracking strategy.

    Step 5: Testing and Publishing

    Before making any changes live, it’s important to test your setup:

    Enter Preview Mode

    Click the “Preview” button in GTM to enter debugging mode. This mode lets you test your tags and triggers in a safe environment. It helps ensure everything works as it should.

    Test Your Trigger

    Go to your website and perform the click action you want to track. This checks that the tag fires correctly. This real-world testing confirms your setup and helps find any issues.

    Check Analytics

    Make sure the event is recorded in your analytics platform. Checking your analytics data ensures that the tags and triggers are working well with your analytics system.

    Publish Changes

    Once everything is confirmed, click “Submit” in GTM to publish your changes. Publishing your setup makes it live. This lets you start collecting important data on user interactions.

    Monitor Performance

    After you publish, check how your tags and triggers are performing often. Regular checks help find any problems and keep your tracking accurate over time.

    Best Practices for Tracking Affiliate Clicks

    Use Clear Naming

    When you set up tags and triggers, use clear and consistent names. This makes it easier to manage your GTM setup as it grows.

    Create Naming Rules

    Make a list of naming rules for your tags and triggers. These rules should cover naming conventions, abbreviations, and formatting to keep things consistent.

    Keep Records of Your Setup

    Keep a detailed document of your GTM setup. Include tag and trigger names, conditions, and related variables. This document helps your team and makes it easier for new members to learn.

    Check Names Regularly

    Regularly review your GTM setup to find any naming issues. Fixing these problems quickly helps keep your tracking system organized and efficient.

    Regularly Review and Update Tags

    Your website and marketing strategies change over time, so your tags and triggers should too. Regularly check your GTM setup to make sure it matches your current goals and tracks user actions correctly.

    Schedule Regular Reviews

    Set a regular schedule to review your GTM setup, like once a month or every few months. These reviews help keep your tracking in line with your business goals and any changes to your website or marketing plans.

    Update Tags for New Campaigns

    When you start new marketing campaigns, update your tags and triggers to collect important data. This way, you will have the information you need to assess how well your campaigns are doing.

    Test After Updates

    After you update your tags and triggers, test the changes to make sure everything works properly. This testing helps avoid data errors and keeps your tracking system reliable.

    Use Built-in Variables

    Google Tag Manager has many built-in variables that can make your tracking easier. Use these variables to gather dynamic data without needing to write custom code.

    Explore Built-in Options

    Take time to look at the built-in variables in GTM. These variables can gather different types of data. They can track page URLs and click elements. This provides you with helpful insights without the need for custom scripts.

    Customize Variable Settings

    Customize the settings of built-in variables to fit your tracking needs. Changing these settings helps you collect more relevant data and improves your analytics accuracy.

    Integrate with Custom Variables

    Combine built-in variables with custom ones to create a complete tracking setup. This combination gives you a better understanding of user behavior and allows for more detailed analysis.

    Conclusion

    Tracking affiliate clicks with Google Tag Manager is an easy way to monitor and improve your affiliate marketing campaigns. By following these steps, you can set up a reliable system to gain useful insights into user interactions. This will help you enhance your marketing strategies and achieve better results.

    Remember, while GTM makes things easier, it’s important to keep testing and refining your setup. This helps you stay updated with changes in your marketing and business environment. With regular monitoring and updates, GTM can be a strong tool in your digital marketing toolkit.

    Google Tag Manager is easy to use. It helps both IT managers and digital marketers track affiliate clicks effectively. This ensures you get the most from your affiliate partnerships. By using its features, you can gain an advantage in the fast-paced world of digital marketing.

  • Ezoic vs Mediavine: Best Ad Platform for Tech Publishers

    Ezoic vs Mediavine: Best Ad Platform for Tech Publishers

    Comparing Ezoic vs Mediavine for Tech Publishers

    Ezoic and Mediavine are ad management platforms that help publishers increase their ad revenue. They provide tools to improve ad performance and user engagement. However, their methods and requirements are different. It is important to know what each platform offers.

    Ezoic Overview

    Ezoic is known for its AI-driven platform. It allows publishers to test different ad placements, sizes, and types. This testing helps find the best setup for revenue and user experience. For tech publishers with various content types and audience needs, this flexibility is very helpful.

    Ezoic has a user-friendly interface and real-time analytics. These features give publishers insights into their performance. This transparency helps tech publishers make smart decisions quickly. Also, Ezoic’s adaptability makes it a good choice as a publisher’s traffic and content change.

    Ezoic also works with many content management systems. This makes it a flexible option for tech publishers using different platforms. This integration simplifies the process of making changes and tracking performance, easing the technical load on the publisher.

    Key Features of Ezoic

      • AI Optimization: Ezoic uses artificial intelligence to test and improve ad layouts automatically. It can adjust to boost performance without needing manual help. This lets publishers focus more on creating content and less on managing ads.
      • Wide Eligibility: Ezoic has no minimum traffic requirements. This makes it easy for smaller publishers to use, which is great for those just starting. This openness allows new tech publishers to start making money early, helping them grow and try new things.
      • Comprehensive Analytics: Ezoic gives detailed analytics that help publishers understand how users behave and how ads perform. This data helps publishers make smart choices that improve user engagement and increase revenue.

      Mediavine Overview

      Mediavine is a full-service ad management platform that focuses on quality and user experience. It is popular with lifestyle and food bloggers, but tech publishers can also find useful features. Its complete approach to ad management ensures that user experience is always a priority.

      Mediavine works with high-quality advertisers, so tech publishers can get premium ad placements. This often leads to higher earnings per ad, making it a good choice for those who meet its entry requirements. The platform is designed for speed and performance. This is ideal for tech audiences. They want fast loading times and smooth navigation.

      In addition to ads, Mediavine offers many resources and support to help publishers improve their sites. This careful method helps tech publishers. They get the tools and knowledge they need. This way, they can increase their revenue and keep their sites running smoothly.

    Key Features of Mediavine

      • High-Quality Advertisers: Mediavine works with top advertisers, leading to better earnings per ad. This partnership gives tech publishers access to valuable ad opportunities that match their audience’s interests.
      • Focus on Speed and Experience: The platform values fast loading times and a good user experience. This is important for keeping tech-savvy audiences engaged. It ensures that ads do not distract from the content, keeping the audience happy.
      • Comprehensive Support: Mediavine provides strong support and resources to help publishers increase their earnings and improve their sites. This includes a helpful community and educational materials, allowing tech publishers to make the most of the platform.Ezoic vs Mediavine

      Ezoic vs. Mediavine: A Comparison

      Both platforms have their strengths, but how do they compare? Knowing their differences is important for making a smart choice that fits your goals.

      Eligibility and Accessibility

      • Ezoic: There is no minimum traffic requirement, making it open to smaller or newer tech publishers. This allows for early monetization and testing, helping publishers at different stages.
      • Mediavine: Requires at least 50,000 sessions per month. This may limit access for smaller sites but ensures a good level of traffic quality. This requirement helps attract premium advertisers.

    Revenue Optimization

      • Ezoic: AI testing helps personalize ads, which can boost ad revenue. This method adapts to changes in audience behavior and site needs.
      • Mediavine: Offers good earning potential with premium advertisers but has strict quality rules. This keeps the site appealing to both advertisers and users.

      User Experience

      • Ezoic: Allows customization to enhance user experience, but AI changes may affect site design. This requires careful checks to keep the user experience positive.
      • Mediavine: Focuses on site speed and user experience, ensuring ads do not distract from content. This commitment to quality improves user satisfaction and keeps tech audiences engaged.

      Support and Community

      • Ezoic: Offers support through self-service resources and direct help, but it can be hard for newcomers. This range of support meets different learning styles and needs.
      • Mediavine: Known for strong community support and helpful resources, making it easier for publishers to succeed. This community provides valuable insights and shared experiences.

    Real-World Considerations for Tech Publishers

    When deciding between Ezoic and Mediavine, tech publishers should consider several factors, including site size, audience type, and long-term goals. Tailoring the choice to specific site characteristics is vital for maximizing benefits.

    Small to Medium Tech Sites

    For smaller sites, Ezoic may be the better choice. It has no traffic requirements and offers flexible testing options. This allows publishers to start making money early and improve as they grow. This flexibility is great for new tech publishers who want to try different ad strategies.

    Ezoic’s AI-driven tools can help smaller sites understand their audience better. By testing continuously, these publishers learn what works best for their unique audience. This helps them grow and engage over time.

    Ezoic also has a supportive community and helpful resources. These are valuable for small to medium tech sites that need guidance. The resources make ad optimization easier for publishers with different skill levels.

    Established Tech Platforms

    For larger platforms with more traffic, Mediavine may provide higher earnings through premium ad placements. Its focus on speed and user experience is important for tech audiences who want fast site performance. These features help keep a smart, tech-savvy audience engaged.

    The premium advertisers that work with Mediavine can greatly increase revenue for established sites. These partnerships create valuable opportunities that use the site’s existing traffic and content quality, boosting overall profits.

    Mediavine also offers strong support to help established tech platforms improve their strategies. This ongoing help keeps them competitive in the fast-changing digital world.

    Conclusion: Choosing the Right Platform

    Choosing between Ezoic and Mediavine requires careful thought about your site’s current metrics and future goals. Both platforms offer strong solutions for ad monetization, but they have different approaches. This means one may fit your needs better than the other.

    In summary:

    • Choose Ezoic if you want flexibility and AI-driven optimization. It is great for smaller or new sites. It has no traffic requirements and offers adaptive testing, making it easy to use.
    • Choose Mediavine if you meet the traffic requirements and want high-quality ads with strong community support. Its premium ad partnerships and focus on user experience are ideal for established sites that want to increase revenue.

    In the end, your choice should match your site’s goals and the experience you want for your audience. Tech publishers can understand the strengths and weaknesses of each platform. This knowledge helps them make smart choices. These choices can increase revenue and improve user satisfaction.

  • How to Integrate AdSense with a WordPress Blog

    How to Integrate AdSense with a WordPress Blog

    Effortless AdSense Integration for WordPress

    Before starting the integration process, it’s important to know what Google AdSense is and how it works. AdSense is a program by Google that lets website owners show ads on their sites. These ads are chosen based on your site’s content and your audience’s interests. This helps create a relevant and smooth user experience.

    The Basics of AdSense

    AdSense connects advertisers and publishers using Google’s large network. It picks ads that fit your site’s content, making them relevant to your audience. This relevance increases the chances of clicks, which can boost your earnings.

    Revenue Generation

    When visitors click on these ads, you earn part of the advertising revenue. The amount you earn per click can change based on the ad’s niche and the competition among advertisers. This model lets even small blogs earn good income over time, especially as their traffic grows.

    Why Choose AdSense?

    AdSense is a popular choice because it is easy to use. It has a large network of advertisers and a reliable payment system. The user-friendly interface provides detailed reports to help you understand your earnings. Also, Google is known for making timely and secure payments, which makes AdSense a trusted partner for many bloggers.

    Preparing Your WordPress Blog

    Before you can use AdSense, make sure your blog meets the eligibility requirements. Your site should have original content, follow AdSense policies, and have clear navigation. Once you confirm this, follow these steps:Integrate AdSense

    1. Check AdSense Eligibility

    Look at AdSense’s eligibility requirements to see if your site qualifies. Your site should have a clean, professional design and enough original content. AdSense usually requires your site to be at least six months old, but this can change by region.

    2. Ensure Compliance with Policies

    AdSense has strict guidelines that your blog must follow. This means avoiding prohibited content like adult material, copyrighted content, and hate speech. Make sure your content follows these rules to avoid account suspension.

    3. Prepare Your Site’s Structure

    A well-structured site improves user experience and helps with AdSense approval. Make sure your site has clear navigation, a good layout, and a professional look. An easy-to-navigate site encourages visitors to stay longer, which can lead to more ad clicks.

    Integrating AdSense with WordPress

    Now that you have set up your AdSense account, it’s time to connect it to your WordPress blog. There are several ways to do this, but we will focus on the easiest methods.

    4. Use a WordPress Plugin

    One of the easiest ways to connect AdSense is by using a WordPress plugin. Plugins like “Ad Inserter” or “Advanced Ads” make it simple to manage ad placements from your WordPress dashboard.

    Benefits of Using Plugins

    Using plugins makes the integration process easier, especially for those who do not know coding. They provide features like ad rotation, scheduling, and A/B testing to improve your ad strategy. Plugins also update automatically, keeping you in line with the latest AdSense rules.

    Installing the Plugin

      1. Go to your WordPress admin panel.
      2. Click on “Plugins” and choose “Add New.”
      3. Search for “Ad Inserter” or “Advanced Ads.”
      4. Click “Install Now” and then “Activate.”

      This process is simple and easy to follow, making it friendly for new users.

      Configuring the Plugin

      1. Open the plugin settings in your WordPress dashboard.
      2. Add your AdSense code, found in your AdSense account under “Ads” > “Ad units.”
      3. Choose where you want your ads to show—like in the header, in posts, or in the sidebar.

      Setting this up correctly is important for getting more ad views and clicks.

      Manual Code Insertion

      If you like to do things yourself, you can add AdSense code directly into your WordPress theme.

    Accessing Theme Editor

      1. In your WordPress admin panel, go to “Appearance” > “Theme Editor.”
      2. Find the theme file where you want the ads, like header.php for header ads or sidebar.php for sidebar ads.

      This method gives you more control over where ads go, but you need to know some HTML and PHP.

      Inserting AdSense Code

      1. Copy the AdSense ad unit code from your AdSense account.
      2. Paste the code into the right section of your theme file.
      3. Save your changes and check your site to see if the ads show up correctly.

      Make sure to check your site often to ensure the ads are working well.

      Best Practices for Manual Insertion

      When adding ads manually, think about user experience and site speed. Don’t put too many ads in one spot, as this can slow down your site and annoy users. Instead, find a good balance that keeps your site fast and looking good.

      Optimizing Ad Performance

      After your ads are live, you should optimize them to increase your revenue.

    6. Monitor and Adjust

    Regularly check how your ads are doing in your AdSense dashboard. Look at metrics like click-through rate (CTR) and earnings per click (EPC). Try different ad sizes and placements to see what works best for your audience.

    Understanding Key Metrics

    CTR and EPC are important for ad performance. A higher CTR means your ad placements are working well. A higher EPC shows that the ad categories are profitable. Checking these metrics often helps you make smart choices about your ad strategies.

    Adjusting Ad Placements

    Try different ad placements to find out which parts of your site get the most clicks. Place ads near content or in spots that are easy to see. But remember to keep a balance so you don’t overwhelm your visitors with ads.

    Enhancing User Engagement

    Engagement is important for ad success. Make sure your content is interesting to keep visitors on your site longer. The more time they spend, the more likely they are to click on your ads.

    7. A/B Testing

    Consider running A/B tests to find the best ad placements and formats. WordPress plugins like “Ad Inserter” have built-in A/B testing features to make this easier.

    How to Conduct A/B Testing

    Create two versions of a page with different ad placements or formats. Use the plugin to show these versions to your visitors. Collect data on their performance over time, then analyze which version works better.

    Interpreting A/B Test Results

    Look for differences in click-through rates, user engagement, and bounce rates between the two versions. Use these insights to improve your ad strategy, focusing on what makes the most money.

    Continuous Improvement

    A/B testing is not a one-time task. Regularly test new ideas and strategies to keep improving your ad performance. This ongoing approach helps you stay ahead in the fast-changing world of online advertising.

    8. Responsive Ad Units

    Make sure your ads are mobile-friendly by using responsive ad units. These units change size to fit different devices, giving all users a smooth experience.

    Importance of Mobile Optimization

    More people are using mobile devices to access content. So, it is important to optimize your ads for mobile. Responsive ads keep your site user-friendly, no matter what device is used.

    Implementing Responsive Ads

    You can set up responsive ad units in your AdSense account. These units change their size based on the screen, so you don’t need separate mobile ads.

    Benefits of Responsive Design

    Responsive ads improve user experience by fitting well into mobile layouts. This can lead to more engagement and higher ad revenue, as users are more likely to click on well-designed ads.

    Ensuring Compliance with AdSense Policies

    Following AdSense policies is important to keep your account safe and avoid penalties. Here are some best practices:

    Avoiding Excessive Ads

    Too many ads can create a bad user experience and break AdSense rules. Limit the number of ads on each page to keep a clean and professional look. This helps build user trust and encourages them to return to your site.

    Following Content Guidelines

    Make sure your content follows Google’s rules, which ban certain types of content. Check AdSense guidelines often to stay updated on any changes. This helps you avoid problems and account suspensions.

    Providing a Privacy Policy

    Write a clear privacy policy that tells users about data collection and ad serving. This transparency is required and builds trust with your audience. Make your privacy policy easy to find on any page of your site.

    Conclusion

    Using AdSense with your WordPress blog can be profitable if done right. By following these steps, you can add ads to your site and start earning money. Keep an eye on ad performance and make changes as needed to boost your earnings. With good management, your WordPress blog can become a valuable asset that earns passive income while you create great content.

    By using tools like WordPress plugins and AdSense’s features, you can manage your ad integration easily and effectively. This ensures you stay compliant and profitable. Happy blogging!

    Check Also  https://themeisle.com/blog/integrate-adsense-with-wordpress/

  • Best Ad Networks for Tech Blogs 2025: Top Platforms

    Best Ad Networks for Tech Blogs 2025: Top Platforms

    Best Ad Networks for Tech Blogs in 2025

    Navigating ad networks can be tough for tech blog owners. With many options, picking the right one is important. The right ad network can greatly increase your revenue.

    In 2025, digital advertising keeps changing. New technologies and trends affect how ads are shown and used. Tech blogs need to stay updated on these changes.

    Ad networks provide different ways to make money. Knowing these ways is key to maximizing your blog’s potential. From CPM to CPA, each method has its pros and cons.

    Choosing the best ad network is about more than just money. Think about ad quality, user experience, and following rules. These factors are crucial for keeping your blog’s good name.

    This guide will look at the top ad networks for tech blogs in 2025. We will share insights into their features, strengths, and weaknesses. Our goal is to help you make smart choices.

    We will also cover strategies to boost ad revenue. Learn how to connect ad networks with your current systems. Find out how to use data analytics for better results.

    Stay tuned as we explore case studies of successful tech blogs. See how they picked their ad networks and what they achieved. Avoid common mistakes and learn from their stories.

    Finally, we will discuss future trends in ad networks and monetization. Knowing these trends will help you prepare for what’s next. Let’s start this journey to improve your tech blog’s ad revenue.

    Why Ad Networks Matter for Tech Blogs

    Ad networks are important for the financial health of tech blogs. They connect blog owners with advertisers who want to pay for ad space. This partnership can turn a hobby into a profitable business.

    For tech blogs, the right ad network can provide steady income. It allows bloggers to focus on creating content without worrying about making money. A steady income helps allocate resources effectively.

    Ad networks make advertising easier. Instead of managing many advertisers, bloggers work with one company. This relationship simplifies operations and cuts down on administrative tasks.

    Choosing the right network affects user experience. A good ad network reduces annoying ads. It ensures that ads are relevant and improve the blog’s appeal.

    Tech blogs target a tech-savvy audience. This audience prefers ads that are not intrusive and are creative. It’s important for ad networks to fit the blog’s audience and interests.

    Key factors to think about when picking an ad network include:

    • Revenue potential
    • Ad quality and relevance
    • Compliance with industry rules (like GDPR and CCPA)

    In the end, the right ad network matches the blog’s goals and audience needs. It enhances the reading experience while increasing revenue.

    How to Choose the Best Ad Network for Your Tech Blog

    Choosing the right ad network for your tech blog takes careful thought. Each network has unique features that can affect your earnings and how readers feel.

    Start by looking at your audience. Know their likes, device use, and how they interact. This will help you pick a network that fits their habits.

    Check the ad formats each network offers. Tech readers often like ads that are not annoying and are targeted. Formats like native ads or contextual ads can keep readers engaged without interrupting the content.

    Look into the network’s payment history. Reliable payments are important for your finances. Choose networks with clear terms and timely payouts.

    Think about how well the network targets audiences. Good targeting makes ads more relevant and increases click-through rates, helping both the advertiser and your blog.

    Here are some things to consider:

    • Types of ads (banner, native, video)
    • Payment methods (CPM, CPC, CPA)

    Following privacy laws like GDPR and CCPA is very important. Make sure the network protects user privacy to keep your blog’s reputation safe.

    The quality of customer support is also key. Good support can fix problems quickly, reducing downtime and loss of income.

    Talk to other tech bloggers to find out about potential ad networks. Ask for recommendations or read reviews to learn from their experiences.

    In the end, choose a network that matches your blog’s long-term goals. Look for networks that offer flexibility, good payouts, and improve the overall user experience.

    Key Ad Monetization Models Explained (CPM, CPC, CPA, and More)

    Ad monetization models are important for making money on tech blogs. Knowing how these models work helps you pick the best one for your content and audience.

    Cost Per Mille (CPM) is a common model. You earn a set amount for every thousand ad views. This model works well if your blog gets a lot of traffic but few clicks.

    In the Cost Per Click (CPC) model, you get paid when people click on ads. CPC is good for blogs with active audiences.

    Cost Per Acquisition (CPA) is different. You get paid when a visitor takes a specific action. This could be making a purchase or filling out a form, which can lead to higher payments.

    Here are the models:

    • CPM: Payment for every thousand views.
    • CPC: Payment for each ad click.
    • CPA: Payment for each user action.

    Some networks offer hybrid models. These mix CPM, CPC, and CPA to boost income based on different visitor behaviors.

    Programmatic advertising is another option. It uses AI to automate ad buying, improving ad performance and relevance.

    Choose models that match your blog’s goals. It’s best to test different models to find which one makes you the most money.Ad Networks

    Top 15 Ad Networks for Tech Blogs in 2025

    Choosing the right ad network is crucial for boosting your blog’s revenue. Each network offers distinct features that cater to different needs. To help you navigate the sea of options, we’ve identified the top 15 ad networks for tech blogs in 2025.

    These networks provide a variety of ad models and tools to optimize your earnings. They also address vital aspects like data privacy and user experience. Our list includes heavyweights like Google AdSense and Media.net, alongside specialized platforms like Monumetric.

    The approach to selecting an ad network depends on several factors. These include audience demographics, the type of content, and traffic volume. Some networks prioritize high traffic, while others value engagement or conversion.

    Testing multiple networks is often advisable. This way, you can identify which platforms align best with your goals. Be prepared to diversify your ad network strategy. This will help stabilize revenue streams in case one network underperforms.

    Explore these top networks to leverage their strengths. Each one has unique features to enhance your blog’s monetization strategy. As the landscape of digital advertising evolves, staying informed and adaptable is key.

    1. Google AdSense

    Google AdSense is a top choice for ad monetization. It has a wide reach and strong analytics that stand out. For tech blogs, it provides ads that connect with your audience.

    AdSense’s automated ad placement makes management simple. It improves both display and performance to boost revenue. Different ad formats, like text and video, enhance the user experience.

    Staying compliant is easy with AdSense. Google helps meet rules like GDPR. However, competition is tough, so it works best for high-traffic blogs.

    2. Media.net

    Media.net is a strong option. It is part of the Yahoo and Bing network and focuses on high-paying ads. These ads match your blog content, making them more relevant.

    This network works well in niche markets and offers solutions for tech audiences. Its easy-to-use dashboard helps you track performance and improve ads.

    Media.net cares about privacy and compliance, which is good for users. It is a great choice for blogs with varied content. However, remember that their approval process is strict.

    3. Ezoic

    Ezoic changes how ads are managed. It uses AI to place ads where they will do best. This technology tests different setups to find the best options.

    The result is more ad revenue and a better user experience. With Ezoic, customization is easy and fits unique blog designs.

    Its features include working with other networks to boost earnings. Along with detailed reports, Ezoic helps users make informed decisions.

    4. AdThrive

    AdThrive is designed for professional bloggers. This network needs a lot of traffic but offers good returns. It focuses on premium ads from trusted brands.

    AdThrive gives personalized service to improve ad placements on your site. They emphasize quality, making sure ads are appealing and not annoying.

    They help you add ads that fit your content, which boosts engagement. This makes it a great choice for blogs that want to grow a lot.

    5. Mediavine

    Mediavine competes closely with AdThrive. It is great for lifestyle and tech blogs that want steady income. Their full-service approach takes care of both planning and execution.

    Mediavine focuses on speed and user experience. They use lazy loading to keep site performance high.

    Working with top advertisers increases earnings, even though there is a high entry requirement. Detailed analytics help bloggers understand how to change their strategies effectively.

    6. Amazon Publisher Services

    Amazon Publisher Services offers special ad solutions. These help you make money from your site with Amazon ads that convert well.

    This network supports different ad types, like shopping and display ads. It works best for tech blogs that recommend products or reviews.

    The integration gives you access to Amazon’s large affiliate program. This can greatly boost your blog’s income.

    7. Adsterra

    Adsterra is known for its global reach and different ad formats. It works well in emerging markets, making it suitable for worldwide audiences.

    Adsterra offers various ads, such as pop-unders and native ads. These options allow for flexible setups based on audience needs.

    Their anti-ad fraud technology protects your earnings. Strong security features make it a trustworthy choice for tech blogs looking to grow internationally.

    8. Infolinks

    Infolinks is great at using ads that don’t bother users. It helps tech blogs keep readers engaged.

    It uses text-based and in-frame ads that fit well with the content.

    Unique ad types, like in-fold, place ads in smart ways. They grab reader attention without interrupting their browsing.

    Infolinks is easy to install and needs only a little coding. It also works well for blogs that focus on text-heavy content.

    9. PropellerAds

    PropellerAds offers new ad solutions for many different audiences. It is known for push notifications and interstitial ads, which help with engagement.

    This network tracks performance metrics, allowing for detailed ad efficiency tracking. Its system improves target engagement through real-time bidding.

    It works well on both desktop and mobile platforms, making it easy to access. PropellerAds uses programmatic advertising to provide targeted solutions.

    10. BuySellAds

    BuySellAds offers a direct marketplace for buying ads. Its platform focuses on transparency and control over placements.

    Tech blogs can sell ads directly to interested marketers. This process makes ad sales easier for both publishers and advertisers.

    BuySellAds guarantees ad quality and relevance, targeting specific audiences. It is especially popular with niches looking for custom ads.

    11. Revcontent

    Revcontent is all about content discovery. It combines recommended content with contextual ads.

    These ads look like regular content, which helps increase engagement. Revcontent’s recommendations improve user experience by being relevant.

    They help tech blogs earn money through visitor engagement. Brands use strong visuals to make ads more attractive.

    12. Taboola

    Taboola supports native advertising. Its platform links content with interested audiences on a large scale.

    Ad options include sponsored articles and videos. These ads are great for blogs that want to boost their brand.

    Taboola’s personalized ads increase engagement by matching user interests. However, strong competition means you need good traffic to see results.

    13. Outbrain

    Outbrain is similar to Taboola because it focuses on content recommendations. It uses smart algorithms to show relevant ads.

    Click-through rates are often higher than traditional ads because they fit in well. It works best with popular blogs that have steady traffic.

    Outbrain campaigns increase visibility and engagement. They help build long-term relationships with audiences by delivering relevant content.

    14. Sovrn //Commerce

    Sovrn //Commerce makes affiliate marketing easier. It turns regular links into money-making ones, earning revenue from sales you refer.

    In addition to regular ads, it creates new income from text links. This model works well for tech bloggers who write about gadgets or product reviews.

    Key benefits include transparency and flexibility. Sovrn //Commerce can be an extra network that improves your current strategies.

    15. Monumetric

    Monumetric helps mid-sized blogs earn more money from ads. This network focuses on making the most of pageviews.

    It offers personalized setups for different types of content and user experiences. Bloggers get detailed support to improve ad placements.

    Monumetric needs some traffic to start, but it rewards growth quickly. It’s great for tech blogs that want to grow and need scalable solutions.

    Specialized and Niche Ad Networks for Tech Blogs

    In 2025, specialized ad networks provide unique benefits for tech blogs. These platforms focus on technology content, ensuring better relevance and engagement with your audience.

    Choosing a specialized network can improve user experience and ad performance. These networks understand tech audiences well. This knowledge helps create targeted campaigns for tech-savvy consumers.

    Specialized networks often have innovative ad formats. These formats fit well with tech content, improving viewer interaction without being annoying.

    Using niche platforms can also lead to higher CPM rates. They attract premium advertisers who want to reach engaged tech enthusiasts.

    Here are some notable specialized ad networks for tech blogs:

    • Carbon: Made for tech audiences, it offers clean and simple ad placements.
    • The Deck: Focused on creative and tech content, it values quality over quantity.
    • BuySellAds Direct: Lets tech sites sell premium ad space directly to interested advertisers.

    Using these niche networks can boost your revenue while keeping a high-quality browsing experience for your audience. By matching ad choices with your blog’s content, you ensure both relevance and effectiveness.

    Comparing the Best Ad Platforms: Features, Strengths, and Weaknesses

    Evaluating ad platforms for your tech blog needs a careful look at their main features. Knowing their strengths and weaknesses helps you create a good monetization strategy.

    One important feature to think about is the range of ad formats available. Ad platforms that offer different formats, like display, video, and native ads, give you more options. This variety lets tech blogs try different ads to see what works best for their audience.

    Top ad networks often have strong audience targeting abilities. These features make sure ads reach users who are likely to engage, which can boost click-through rates and revenue.

    However, some platforms have drawbacks. Not all ad networks work well with mobile optimization. This is important for tech blogs that get a lot of mobile traffic.

    A common issue is slow payment cycles. It’s important to choose a network that pays on time to keep your cash flow steady.

    Platforms also differ a lot in their data analytics and reporting features. Good analytics tools help tech bloggers improve their strategies based on real data.

    Some ad networks may not have strong compliance features for laws like GDPR and CCPA. It’s crucial to ensure full compliance to avoid legal problems and keep your audience’s trust.

    Features to Compare:

    • Ad format diversity
    • Audience targeting options
    • Analytics and reporting capabilities

    Strengths and Weaknesses:

    • Strengths: Advanced targeting, diverse formats, robust analytics
    • Weaknesses: Payment delays, limited mobile optimization, compliance challenges

    By comparing these aspects, tech blog owners can select the best ad platform that aligns with their specific needs and goals.

    Ad Quality, User Experience, and Compliance (GDPR, CCPA)

    Maintaining ad quality is important for a tech blog’s reputation. Low-quality ads can drive away visitors and hurt engagement.

    User experience should always come first. Ads need to be relevant and not intrusive. This balance keeps users interested in your content.

    Following privacy rules, like GDPR and CCPA, is essential. Ad networks that protect data are important. They help keep user information safe and build trust.

    Tech blogs should work closely with ad networks to ensure they follow the rules. This means setting up user consent features and data handling policies.

    Here are some key compliance points to consider:

    • Check that ad networks follow GDPR and CCPA rules.
    • Make sure user consent mechanisms are easy to understand.
    • Regularly review privacy policies and data protection practices.

    Balancing ad quality, user experience, and compliance helps your tech blog stay competitive. It also builds user trust, which is key for long-term success.

    Maximizing Revenue: Advanced Strategies for Tech Blogs

    Monetizing your tech blog effectively takes more than just putting up ads. Using smart strategies can greatly increase your ad revenue.

    First, use different ad formats. Mix banners, native ads, and videos. This will appeal to various audience preferences and boost engagement.

    Next, optimize where you place your ads. Put them in busy areas of your site. Test and adjust placements for the best results.

    Consider programmatic advertising. This automates ad buying, helping your ads reach the right audience at the right time.

    Look into affiliate marketing. Promoting products that fit your niche can create a steady income. Choose affiliates that connect with your readers.

    Think about these options for variety:

    • Add content partnerships or sponsored posts.
    • Try subscription models or premium content.

    Engage your audience with personalized ad experiences. Use data to tailor ads based on user behavior.

    Make sure your website runs well to reduce load times. Faster sites lead to better user engagement and more ad views.

    Finally, keep track of your results. Regularly check performance metrics to find areas to improve. This ongoing refinement will help ensure steady revenue growth.

    Case Studies: Successful Tech Blogs and Their Ad Network Choices

    Exploring real-world examples can give tech bloggers useful insights. Let’s look at a few successful cases.

    TechSavvy is a top tech blog that increased revenue using Ezoic. They optimized ad placements with Ezoic’s AI tools. This led to a 45% rise in ad revenue.

    Another example is ByteWise Media. They used Google AdSense and Media.net for their dual-platform strategy. This helped them take advantage of each network’s strengths for both contextual and display ads.

    Next is GadgetGeeks. They teamed up with AdThrive and focused on high-quality content. This attracted premium advertisers and boosted their CPM rates.

    Key takeaways from these case studies include:

    • Aligning ad networks with your content style is important.
    • Use advanced technology for ad optimization.
    • Multi-network strategies can create diverse income streams.

    These examples show the potential for higher earnings when ad networks are chosen and used wisely.

    Common Pitfalls and How to Avoid Them

    Navigating ad networks can be tricky. Common mistakes can hurt your income and user experience.

    One big problem is relying too much on one ad network. If their terms change, your income may drop.

    Bad ad placement is another issue. It can lower click-through rates and hurt your overall revenue.

    Ignoring ad quality can damage user trust and your site’s reputation. Make sure ads match your brand values.

    To avoid these mistakes, follow these tips:

    • Use different ad networks to spread out risk.
    • Place ads where they are easy to see and engage with.
    • Check ad content regularly to ensure quality.

    By avoiding these common errors, you can boost your blog’s revenue and keep a good user experience.

    Future Trends: What’s Next for Ad Networks and Tech Blog Monetization?

    The world of ad networks is always changing, especially for tech blogs. New trends show exciting changes ahead.

    AI and machine learning are becoming more important. These tools help target ads better and make campaigns more efficient.

    Also, privacy will keep influencing ad strategies. Following rules like GDPR is very important.

    Augmented reality ads are becoming popular. These interactive ads could change how users engage with tech blogs.

    Here are some key trends to watch:

    • More use of AI for better ad targeting
    • Growing need to follow privacy laws
    • Rise of interactive and engaging ad formats
    • Use of blockchain for safe ad transactions

    Staying updated on these trends helps tech blogs adapt and succeed. Using new technologies can create more ways to earn money.

    Frequently Asked Questions (FAQ)

    What are the best ad networks for tech blogs in 2025?

    The best ad networks have high CPM rates, reliable service, and innovation. Google AdSense and Media.net are great options.

    How can tech blogs make more money from ads?

    Using multiple ad networks and optimizing ad placements can increase revenue. Testing different strategies is also important.

    What ad models work best for tech blogs?

    CPM, CPC, and CPA are common models. The best choice depends on the blog’s traffic and engagement.

    How do ad networks protect data privacy?

    Top ad networks follow rules like GDPR and CCPA. Make sure they focus on data privacy in their policies.

    Are interactive ads worth it?

    Yes, interactive ads engage users better. Tech-savvy audiences usually respond well to these types of ads.

    What are the risks of using many ad networks?

    Managing several networks can be tricky. However, the chance for more revenue often makes it worth it.

    Do ad networks provide customer support?

    Yes, most networks offer customer support. The quality of service can vary, so check reviews.

    Why is programmatic advertising important?

    Programmatic advertising automates ad buying. It improves targeting and can lead to better returns for tech blogs.

    Conclusion: Choosing the Right Ad Network for Your Tech Blog in 2025

    Choosing an ad network is key for tech blogs that want to maximize revenue. It’s important to assess networks based on your blog’s needs and goals. Balance ad quality, user experience, and privacy law compliance.

    Using multiple ad networks can diversify income and reduce reliance on one platform. Adjust your strategy with regular testing and adapt to new trends. This helps ensure long-term growth.

    Remember, the right choice boosts both revenue and audience satisfaction. Stay informed and open to changes, as digital advertising keeps evolving. With the right strategy, your tech blog can succeed in 2025 and beyond.

    Check Also https://www.adpushup.com/blog/the-best-ad-networks-for-publishers/

  • Affiliate Marketing with Amazon: Beginner’s Guide

    Affiliate Marketing with Amazon: Beginner’s Guide

    How to Start Affiliate Marketing with Amazon

    Affiliate marketing is a performance-based marketing strategy where you earn a commission by promoting other companies’ products. In simple terms, you recommend products to others, and when they purchase through your unique affiliate link, you earn a percentage of the sale.

    The Mechanics of Affiliate Marketing

    At its core, affiliate marketing involves three parties: the merchant, the affiliate, and the customer. The merchant is the creator of the product, the affiliate markets the product, and the customer purchases the product. This triangular relationship is built on trust and effectiveness, with each party playing a crucial role in the ecosystem.

    Affiliates often leverage various platforms such as blogs, websites, and social media to promote products. The key to success lies in creating compelling content that resonates with audiences and encourages them to make a purchase. Affiliates must also strategically place their links to maximize visibility and conversions.

    Benefits of Affiliate Marketing

    Affiliate marketing offers numerous advantages, making it an attractive choice for many. Firstly, it’s a low-risk venture since you don’t need to invest in product creation or inventory management. Secondly, it provides flexibility, allowing you to work from anywhere and choose products that align with your interests.

    Moreover, affiliate marketing can be a lucrative source of passive income. Once you’ve set up your promotional channels and content, you can earn money while you sleep. This scalability is appealing, as you can promote multiple products and tap into diverse income streams.

    Challenges in Affiliate Marketing

    Despite its benefits, affiliate marketing isn’t without challenges. The competition can be fierce, especially in popular niches. Standing out requires creativity and strategic planning. Additionally, maintaining transparency and trust with your audience is crucial, as deceptive practices can damage your reputation.

    Another challenge lies in understanding and adapting to algorithm changes on platforms like Google and social media. Affiliates must stay informed about trends and updates to optimize their strategies. Lastly, managing multiple affiliate programs and tracking performance can be time-consuming but essential for long-term success.

    Why Choose Amazon for Affiliate Marketing?

    Amazon is a giant in the e-commerce world, offering a vast range of products. Here’s why starting your affiliate marketing journey with Amazon makes sense:

    Wide Product Range

    Amazon’s extensive catalog is unmatched, with millions of products spanning various categories. This diversity allows affiliates to select products that align with their niche or expertise. Whether you’re interested in electronics, fashion, or home goods, Amazon has something for everyone.

    By promoting products that resonate with your audience, you can establish credibility and trust. This personalized approach enhances your chances of conversion, as your audience is more likely to buy products that match their interests or solve their problems.

    Trusted Brand

    Amazon’s reputation as a reliable and customer-centric platform is a significant advantage for affiliates. The brand’s credibility can make it easier for affiliates to convert clicks into purchases. Consumers often feel more comfortable buying from a well-known retailer, which can enhance your conversion rates.

    Leveraging Amazon’s trust factor, affiliates can focus on creating quality content without worrying about the product’s legitimacy. This trust also extends to Amazon’s customer service, which provides a safety net for buyers, further increasing the likelihood of sales.

    Competitive Commissions

    While Amazon’s commission rates vary by category, the potential to earn is significant, especially with a high volume of sales. Affiliates can benefit from Amazon’s tiered commission structure, which rewards higher sales with increased commissions.

    Moreover, Amazon’s 24-hour cookie duration means that affiliates earn commissions on any product a customer purchases after clicking their link, not just the specific product promoted. This can lead to additional earnings, as customers often make multiple purchases in one session.

    Global Reach

    Amazon’s global presence offers affiliates the opportunity to reach international audiences. With localized websites in numerous countries, affiliates can tap into diverse markets and expand their earning potential. This global reach is particularly beneficial for affiliates who create content in multiple languages.

    Furthermore, Amazon’s reliable shipping and customer service enhance the shopping experience for international customers. By promoting Amazon’s products, affiliates can confidently cater to a worldwide audience, knowing that Amazon will handle the logistics.Affiliate Marketing with Amazon

    How to Join the Amazon Affiliate Program

    Step 1: Sign Up for Amazon Associates

    To start, you need to join the Amazon Associates program. Here’s how:

    Visit the Amazon Associates Page

    Begin your journey by navigating to the Amazon Associates website. The user-friendly interface guides you through the registration process. Click on the “Join Now” button, which directs you to the sign-up page. This step is straightforward, but it’s essential to have your basic information ready for a smooth process.

    Create an Account

    If you already have an Amazon account, you can use it to sign in. This simplifies the process, allowing you to leverage your existing account details. If not, creating a new account is equally simple. Provide the necessary information, including your name, email address, and password. This foundational step is crucial as it forms the backbone of your affiliate activities.

    Provide Your Details

    Fill in your account information, including your website or blog URL where you plan to promote products. This step involves detailing your online presence, which Amazon uses to verify your eligibility. Be specific about your site’s niche and audience to improve your chances of approval. This transparency helps Amazon understand how you intend to drive traffic to their platform.

    Set Up Your Profile

    Describe how you drive traffic to your site and select the Amazon products you want to promote. This stage involves outlining your marketing strategies, from SEO to social media engagement. Choose product categories that align with your expertise, as this increases your potential for success. By showcasing your marketing plan, you demonstrate your commitment and potential as an affiliate.

    Verify Your Identity

    Complete the identity verification process, which may include providing a valid phone number for a call verification. This step ensures the integrity of the program and protects both parties involved. Be prepared to verify your identity promptly, as delays can hinder your progress. Once verified, you’re officially part of the Amazon Associates program and ready to start promoting.

    Step 2: Create Your Affiliate Links

    Once your account is set up, you can start creating affiliate links:

    Browse Products

    Use the Amazon Associates dashboard to find products you wish to promote. This platform offers robust search features, allowing you to filter products by category, price, and popularity. Take your time exploring the vast array of options, as selecting the right products is crucial for your success. Consider product reviews and ratings as indicators of quality and customer satisfaction.

    Generate Links

    Click on the “Get Link” button next to the product to generate your unique affiliate link. This link acts as your digital referral, tracking all sales attributed to your promotion. Ensure the link is correctly generated to avoid any tracking issues. By monitoring your link’s performance, you can gain insights into customer behavior and refine your marketing strategies.

    Customize Links

    You can choose from various link styles, including text, image, or a combination of both. This customization allows you to tailor the links to suit your platform’s design and aesthetic. Experiment with different styles to see which resonates best with your audience. A visually appealing link can enhance click-through rates and, subsequently, conversions.

    Step 3: Promote Your Links

    There are numerous ways to promote your affiliate links effectively:

    Blog Posts

    Write articles or reviews about the products and embed your affiliate links within the content. Focus on creating high-quality, informative content that adds value to your readers. Product comparisons, guides, and tutorials often perform well, as they help consumers make informed decisions. By positioning yourself as an expert, you can build trust and encourage purchases.

    Social Media

    Share your links on platforms like Facebook, Instagram, or Twitter to reach a broader audience. Social media offers dynamic ways to engage with followers through posts, stories, and videos. Utilize hashtags and trending topics to increase your reach and visibility. Engaging with your audience through comments and messages can also foster community and trust.

    Email Marketing

    If you have an email list, include your affiliate links in newsletters or promotional emails. Email marketing remains a powerful tool for reaching a targeted audience with personalized content. Craft compelling subject lines and content to capture your subscribers’ attention. By segmenting your list, you can tailor your promotions to different audience segments for maximum impact.

    Tips for Successful Affiliate Marketing with Amazon

    Choose the Right Products

    Selecting the right products to promote is crucial. Focus on products that are relevant to your niche or audience. High-demand products with positive reviews tend to perform well.

    Align with Your Niche

    Identify products that seamlessly integrate with your niche or area of expertise. This alignment enhances your credibility and ensures your audience finds the recommendations relevant. By focusing on a specific niche, you can position yourself as an authority, making it easier to gain your audience’s trust and encourage purchases.

    Consider Product Demand

    Research the demand for products before promoting them. Use tools like Google Trends and Amazon Best Sellers to gauge popularity. High-demand products often translate to higher conversion rates, as they indicate a strong consumer interest. By promoting trending products, you can capitalize on current market dynamics and boost your earnings.

    Assess Customer Reviews

    Customer reviews provide valuable insights into a product’s quality and user experience. Focus on promoting products with positive reviews and high ratings. This approach minimizes the risk of recommending subpar products and enhances your reputation. Satisfied customers are more likely to leave positive feedback, further boosting your credibility.

    Create Quality Content

    Creating valuable content is key to attracting an audience. Whether it’s a detailed product review, a how-to guide, or a comparison article, ensure your content is informative and engaging.

    Develop Informative Reviews

    Craft detailed and unbiased product reviews that highlight both the pros and cons. Transparency builds trust with your audience, encouraging them to make informed purchasing decisions. Incorporate personal anecdotes or experiences to make the content relatable and authentic.

    Write Engaging How-To Guides

    How-to guides are effective in addressing common pain points and providing solutions. Break down complex processes into simple steps, using visuals or videos to enhance understanding. By solving your audience’s problems, you can build a loyal following and encourage repeat visits to your site.

    Compare Products

    Comparison articles can help consumers weigh their options and choose the best product for their needs. Highlight key features, differences, and pricing to provide a comprehensive overview. This type of content is particularly useful for consumers in the decision-making stage, making it a powerful tool for driving conversions.

    Utilize SEO Best Practices

    Optimize your content for search engines to increase visibility. Use relevant keywords, such as “affiliate marketing guide” or “how to start affiliate marketing with Amazon”, naturally within your content.

    Conduct Keyword Research

    Identify relevant keywords and phrases that your target audience is searching for. Use tools like Google Keyword Planner or SEMrush to find high-volume keywords with low competition. Incorporate these keywords strategically within your content, titles, and meta descriptions to improve search rankings.

    Optimize On-Page Elements

    Ensure your content is optimized for search engines by refining on-page elements. This includes using descriptive URLs, adding alt text to images, and creating compelling meta tags. By optimizing these elements, you can enhance your content’s visibility and improve click-through rates.

    Build Quality Backlinks

    Backlinks from reputable sites can significantly boost your search engine rankings. Focus on building relationships with other bloggers or influencers in your niche to earn quality backlinks. Guest posting and collaborations are effective strategies for acquiring backlinks and expanding your reach.

    Analyze Your Performance

    Use Amazon’s reporting tools to track your performance. Analyze which products are converting well and adjust your strategy accordingly.

    Monitor Key Metrics

    Track essential metrics such as click-through rates, conversion rates, and earnings per click. These metrics provide insights into your performance and highlight areas for improvement. By regularly monitoring these metrics, you can make data-driven decisions to optimize your strategy.

    Identify Top-Performing Products

    Identify products that consistently generate high conversions and focus on promoting them more aggressively. Consider creating additional content or campaigns around these products to maximize their potential. By capitalizing on proven winners, you can boost your overall earnings.

    Adjust Your Strategy

    Use performance data to refine your marketing strategies and tactics. Experiment with different content formats, promotional channels, and target audiences to find the most effective approach. Continuous testing and optimization are key to staying competitive and achieving long-term success.

    Stay Compliant

    Make sure to comply with Amazon’s guidelines and the Federal Trade Commission (FTC) regulations. This includes disclosing your affiliate relationship on any platform where you share your affiliate links.

    Understand Amazon’s Policies

    Familiarize yourself with Amazon’s affiliate program policies to ensure compliance. These policies cover aspects such as link placement, content guidelines, and prohibited practices. By adhering to these guidelines, you can maintain a positive relationship with Amazon and avoid potential penalties.

    FTC Disclosure Requirements

    Disclose your affiliate relationship clearly and conspicuously in your content. This transparency is required by the FTC to ensure consumers are aware of any financial incentives. Use phrases like “This post contains affiliate links” or “As an Amazon Associate, I earn from qualifying purchases.”

    Maintain Transparency

    Honesty and transparency are crucial in affiliate marketing. Be upfront with your audience about your affiliations and the potential for earnings. By maintaining transparency, you can build trust with your audience and foster long-term relationships.

    Frequently Asked Questions

    How Much Can You Earn with Amazon Affiliate Marketing?

    Earnings vary based on factors like the number of clicks, conversion rate, and the commission rate of the products you promote. While some affiliates earn a small side income, others make substantial earnings.

    Factors Influencing Earnings

    Several factors influence your earnings as an Amazon affiliate. These include your niche, traffic volume, and the types of products you promote. High-ticket items often yield higher commissions, while niche products may offer less competition. Understanding these factors can help you set realistic expectations and goals.

    Potential Income Range

    The potential income range for Amazon affiliates is broad. Some affiliates earn a few hundred dollars per month, while others make thousands. Success stories often involve affiliates who have honed their strategies, built a loyal audience, and diversified their income streams.

    Maximizing Earnings

    To maximize earnings, focus on increasing traffic, improving conversion rates, and promoting a diverse range of products. Experiment with different promotional channels and content formats to find what works best for your audience. By continuously refining your approach, you can unlock new opportunities for growth.

    Do I Need a Website to Start?

    While having a website or blog is beneficial, it’s not mandatory. You can promote products through social media channels, YouTube, or other online platforms.

    Benefits of Having a Website

    A website provides a centralized platform for your content and promotions. It allows you to build an audience, establish authority, and optimize for search engines. Additionally, a website offers greater control over your branding and user experience.

    Alternative Platforms

    If you don’t have a website, consider using social media, YouTube, or email marketing to promote products. These platforms offer unique advantages, such as built-in audiences and engagement tools. Choose platforms that align with your strengths and where your target audience is most active.

    Balancing Multiple Channels

    Many successful affiliates use a combination of websites and alternative platforms to maximize their reach. By diversifying your promotional channels, you can tap into different audience segments and reduce reliance on a single platform. This multi-channel approach can enhance your resilience and adaptability in the ever-changing digital landscape.

    How Do I Get Paid?

    Amazon pays affiliates through direct deposit, check, or Amazon gift cards. Payments are made monthly, but you must meet the minimum threshold to receive payment.

    Payment Methods

    Amazon offers several payment methods to accommodate affiliates’ preferences. Direct deposit is the most convenient option, providing quick and secure transfers to your bank account. Alternatively, you can opt for checks or Amazon gift cards, depending on your needs.

    Payment Thresholds

    To receive payments, affiliates must meet a minimum threshold, which varies based on the selected payment method. Understanding these thresholds is important for managing your cash flow and planning your finances. By tracking your earnings, you can ensure timely payments and avoid delays.

    Managing Payment Details

    Keep your payment details up to date in the Amazon Associates dashboard. This includes your bank account information, mailing address, and tax details. Regularly reviewing and updating this information ensures a seamless payment process and avoids potential issues.

    Conclusion

    Starting affiliate marketing with Amazon is a feasible and rewarding endeavor. By joining the Amazon Associates program, creating engaging content, and promoting your links strategically, you can build a successful affiliate marketing business. Remember to keep learning, stay updated with trends, and continuously optimize your strategies for the best results.

    Taking Action

    Now that you have the knowledge, it’s time to take action and start your affiliate marketing journey with Amazon. Begin by signing up for the program, exploring the vast product range, and creating your first affiliate links. With dedication and perseverance, you can achieve your goals and enjoy the benefits of passive income.

    Long-Term Success

    Affiliate marketing is a changing field that needs constant learning. Keep up with industry trends, consumer habits, and new technology. By being proactive and open to change, you can stay ahead and find long-term success.

    Final Thoughts

    Affiliate marketing with Amazon offers limitless possibilities for growth and income. Embrace the journey with enthusiasm, creativity, and a commitment to excellence. With the right mindset and approach, you can turn your affiliate marketing efforts into a sustainable and rewarding venture. Good luck!

    Check Also  https://influencersplace.com/blog/amazon-affiliate-program/